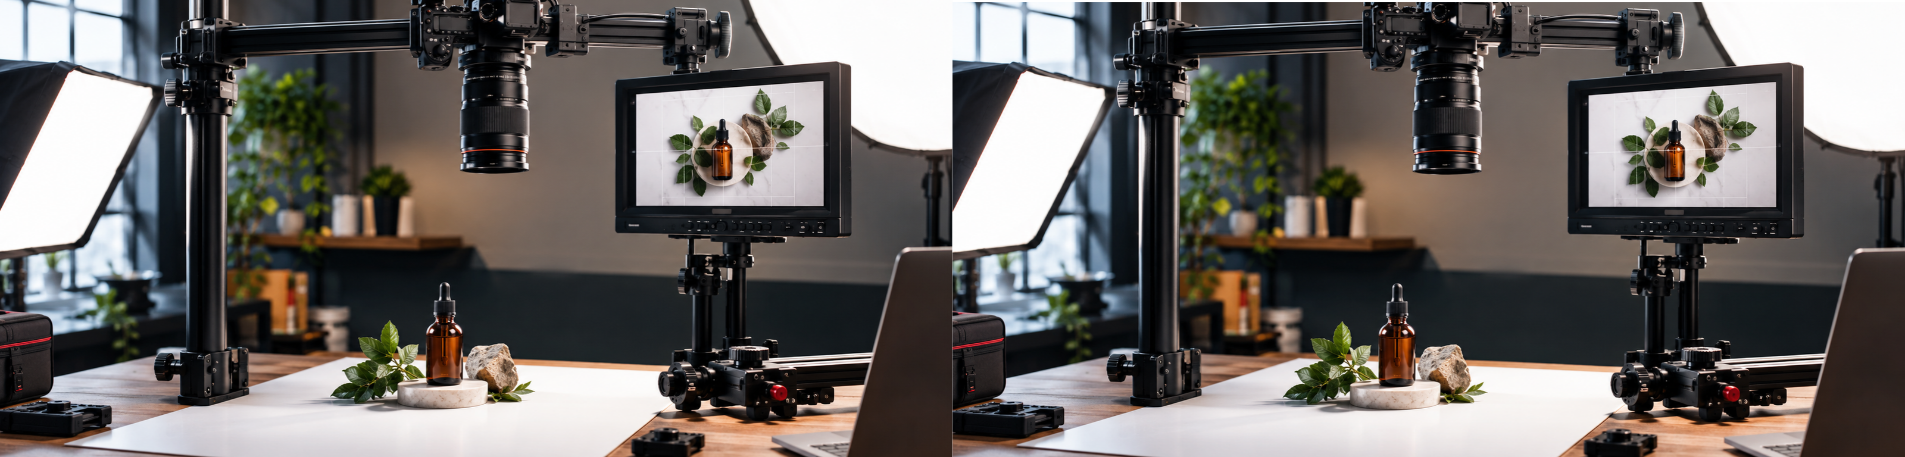
Creating engaging video content often depends on more than a good camera and proper lighting. Camera positioning plays a significant role in how clearly a product is presented, how easily viewers follow a tutorial, and how professionally a video looks. For product photographers, content creators, educators, and filmmakers, overhead camera rigs offer a practical way to capture consistent footage from above.
Creating engaging video content often depends on more than a good camera and proper lighting. Camera positioning plays a significant role in how clearly a product is presented, how easily viewers follow a tutorial, and how professionally a video looks. For product photographers, content creators, educators, and filmmakers, overhead camera rigs offer a practical way to capture consistent footage from above.
Whether the goal is to film an unboxing, demonstrate a craft, record a cooking tutorial, or showcase a product in detail, an overhead camera setup can make the process easier and more efficient. With the right mounting equipment, creators can achieve stable top-down shots without constantly adjusting a handheld camera or improvising with unsuitable supports.
What Is an Overhead Camera Rig?
An overhead camera rig is a mounting system that positions a camera above a subject, workspace, or tabletop. Instead of filming from eye level or a traditional front-facing angle, the camera points downward to capture the scene from above.
This perspective is particularly useful when the subject involves objects arranged on a surface or activities performed with the hands. It allows viewers to see the entire working area, follow individual steps, and examine important details without obstructions.
Overhead rigs may include mounting arms, support structures, camera attachments, clamps, and other components designed to hold compatible equipment in position. Depending on the design, they can accommodate different workspace arrangements and filming requirements.
For creators who regularly produce instructional or product-focused content, a dedicated rig can provide greater consistency than makeshift mounting solutions.
Why Overhead Filming Matters for Modern Content Creation
Top-down filming has become a valuable technique across several types of digital content. Its appeal comes from its ability to present information clearly while keeping the main subject at the center of attention.
Better Visibility for Tutorials and Demonstrations
Cooking videos, art demonstrations, DIY projects, and educational tutorials often require viewers to observe small movements. A camera positioned directly above the workspace makes these actions easier to follow.
For example, a cooking creator can show ingredients being mixed, chopped, and arranged without repeatedly changing camera angles. Similarly, an artist can demonstrate drawing techniques while keeping the paper and tools visible throughout the process.
More Effective Product Presentation
Product videos benefit from angles that reveal details customers might not notice in a standard front-facing shot. Overhead footage can highlight product dimensions, packaging, surface textures, included accessories, and the way individual components fit together.
This approach works well for unboxing videos, stationery reviews, cosmetics demonstrations, technology accessories, and tabletop product photography. It can also help create consistent visual content across multiple product listings or review articles.
A Cleaner and More Organized Frame
An overhead camera rig can help establish a dedicated filming area. Once the camera is positioned correctly, creators can arrange products, props, and lighting around a repeatable frame.
This consistency is particularly useful for creators who publish frequently. A dependable setup reduces the need to recreate camera positioning for every recording session and helps maintain a recognizable visual style.
Choosing the Right Overhead Camera Rig for a Filming Setup
Not every overhead camera rig is designed for the same type of production. The right option depends on the available workspace, camera weight, required shooting height, and the accessories needed for each project.
Compact Rigs for Small Workspaces
Creators working from a desk or home office may prefer a compact overhead camera stand. These setups are suitable for smartphone filming, small product demonstrations, stationery content, and tabletop tutorials.
The Glide Gear OH 50 Camera/Smartphone Overhead Stand is one option worth considering. It features an adjustable arm extending from 21 to 36 inches, a smartphone holder, a ball head, and mounting points for compatible accessories. Its lightweight aluminum construction makes it a practical choice for creators who need flexible positioning in a limited space.
Tabletop Platforms for Consistent Top-Down Shots
A tabletop platform may be better suited to creators who want a dedicated filming station. Its frame supports an overhead camera position while keeping the work surface available for arranging products, tools, and props.
The Glide Gear OH 100 Professional Top Down Overhead Rig is designed for this type of setup. Its steel and aluminum construction, adjustable camera mounting sled, and multiple accessory mounting points make it useful for cooking demonstrations, art tutorials, and stop-motion projects. The adjustable structure also allows creators to adapt camera positioning to different subjects.
Modular Rigs for More Advanced Productions
Larger productions may require additional flexibility for camera positioning, lighting, monitors, or microphones. In these situations, a modular rig can provide more configuration options than a basic desktop mount.
The Glide Gear OH 200 Adjustable Camera/Smartphone Overhead Rig offers an adjustable mounting sled, multiple accessory mounting points, and a modular rail design. Its height adjusts from 23 to 36 inches, making it worth evaluating for more elaborate tabletop filming arrangements.
Koncept Innovators, LLC
The most suitable option depends on the specific production requirements. Before purchasing, creators should verify camera compatibility, payload limits, mounting requirements, and the amount of space available.
How to Set Up an Overhead Camera Rig for Better Results
Even a capable camera rig needs thoughtful positioning to produce clean, professional-looking footage. A few practical adjustments can improve both image quality and recording efficiency.
1. Choose a Stable Surface
Begin with a level, sturdy table or appropriate support structure. Confirm that the rig is securely assembled and that every connection is tightened according to the manufacturer's instructions.
Camera equipment positioned overhead requires particular care because an unstable mount can damage equipment or cause injury. Follow the manufacturer's payload limits, use any required counterweights, and avoid placing the setup where it could be accidentally knocked over.
2. Position the Camera Carefully
Adjust the camera until the entire subject fits comfortably within the frame. Leave enough room around the edges for hands, tools, packaging, or other objects that may enter the scene.
For flat-lay product photography, a centered camera position can create a balanced composition. For tutorials, a slightly wider frame may be necessary to show each step clearly.
3. Improve Lighting Before Recording
Overhead cameras can cast shadows when the creator's hands move across the workspace. Positioning lights to the sides of the subject can help reduce harsh shadows and maintain even illumination.
Soft lighting is particularly useful for reflective packaging, glossy products, food, and small objects with fine details. Additional lights should be mounted only on compatible attachment points and within the rig's specified load limits.
4. Check Focus and Exposure
Before recording, inspect the frame for sharpness, unwanted reflections, and distracting background elements. Locking focus and exposure when appropriate can help prevent the image from changing unexpectedly during a demonstration.
A short test recording is also useful for identifying problems that may not be obvious while looking at the camera screen.
Common Mistakes to Avoid When Using an Overhead Camera Mount
One frequent mistake is choosing a rig without considering the combined weight of the camera and accessories. A mount that accommodates a lightweight smartphone may not be suitable for a heavier camera and lens combination.
Another issue is overlooking the available shooting area. A rig may support overhead filming but still leave insufficient room for the products, lighting equipment, or movements required by the project.
Poor cable management can also create unnecessary hazards. Keep power and accessory cables organized, away from moving parts, and clear of the filming workspace.
Finally, an overhead angle should serve the content rather than simply look different. If the subject is difficult to understand, the camera may need to be repositioned or the composition simplified.
Who Benefits Most From an Overhead Camera Rig?
Overhead camera rigs can be useful for a wide range of creators and businesses.
- Product photographers: Capture flat-lay images, packaging details, and consistent product compositions.
- YouTubers and social media creators: Film unboxing videos, craft demonstrations, and hands-on reviews.
- Educators: Demonstrate practical skills while keeping the workspace visible to students.
- Small businesses: Produce product videos for websites, online stores, and digital marketing campaigns.
- Artists and DIY enthusiasts: Record drawing, painting, assembly, and other step-by-step projects.
A dedicated rig can be especially valuable for anyone who repeatedly records similar content and wants a reliable, repeatable camera angle.
Final Thoughts
An overhead camera rig can make product photography and instructional video production more organized, consistent, and visually effective. By keeping the camera securely positioned above the subject, it allows creators to concentrate on the demonstration instead of constantly adjusting their equipment.
The best choice depends on the intended application, available workspace, camera specifications, and need for additional accessories. Compact stands such as the OH 50 may suit simple tabletop projects, while the OH 100 and OH 200 offer alternative configurations for dedicated filming stations and more adaptable setups.
With a stable mounting system, thoughtful lighting, and careful framing, creators can produce clearer tutorials, more engaging product demonstrations, and polished overhead footage. Exploring the overhead rig collection from Glide Gear can help identify equipment suited to different filming environments and creative goals.